
Introduction
Proper pipe installation is crucial for the efficient and safe functioning of any plumbing system. Whether you are installing pipes for a new construction project or replacing old pipes in an existing building, it is important to understand the basics of pipe installation to ensure a successful and long-lasting result. This article will provide a comprehensive guide to pipe installation, covering everything from choosing the right pipe for your project to testing and maintaining your pipes for optimal performance.
Understanding the Basics of Pipe Installation
Before diving into the specifics of pipe installation, it is important to have a basic understanding of the different types of pipes and their uses. There are several types of pipes commonly used in plumbing systems, including copper, PVC, PEX, and galvanized steel. Each type of pipe has its own advantages and disadvantages, and the choice of pipe will depend on factors such as the intended use, budget, and local building codes.
In addition to the different types of pipes, there are also various pipe fittings that are used to connect and redirect pipes. These fittings include elbows, tees, couplings, and valves, among others. Each fitting serves a specific purpose, such as changing the direction of the pipe, connecting two pipes of different sizes, or controlling the flow of water. Understanding the different types of fittings and their functions is essential for a successful pipe installation.
Choosing the Right Pipe for Your Project
When selecting a pipe for your project, there are several factors to consider. First and foremost, you need to determine the intended use of the pipe. For example, if you are installing pipes for a water supply system, you will need a pipe that is suitable for carrying potable water. On the other hand, if you are installing pipes for a drainage system, you will need a pipe that is resistant to corrosion and can handle the flow of waste water.
Another important factor to consider is the local building codes and regulations. Different regions may have specific requirements for the type of pipe that can be used in plumbing systems. It is important to familiarize yourself with these codes and ensure that the pipe you choose complies with the regulations in your area.
When comparing different types of pipes, it is important to consider their pros and cons. For example, copper pipes are known for their durability and resistance to corrosion, but they can be more expensive than other types of pipes. PVC pipes, on the other hand, are affordable and easy to install, but they may not be suitable for hot water applications. PEX pipes are flexible and easy to work with, but they may not be suitable for outdoor use. By weighing the pros and cons of each type of pipe, you can make an informed decision that meets the needs of your project.
Tools You’ll Need for a Successful Installation
To ensure a successful pipe installation, you will need a variety of tools. Some of the essential tools for pipe installation include a pipe cutter, a deburring tool, a reamer, a pipe wrench, a pipe bender, and a tape measure.
A pipe cutter is used to cut pipes to the desired length. It is important to use a pipe cutter that is designed for the specific type of pipe you are working with. A deburring tool is used to remove any burrs or rough edges from the cut end of the pipe, ensuring a smooth and secure connection. A reamer is used to remove any internal burrs or rough edges from the inside of the pipe, ensuring a clean and unrestricted flow of water.
A pipe wrench is used to tighten and loosen pipe fittings. It is important to use a pipe wrench that is the correct size for the pipe and fitting you are working with to avoid damaging the pipe or fitting. A pipe bender is used to bend pipes to the desired angle. It is important to use a pipe bender that is designed for the specific type and size of pipe you are working with to avoid kinks or cracks in the pipe.
A tape measure is used to measure the length of the pipe and ensure accurate cuts. It is important to measure twice and cut once to avoid wasting materials. Additionally, you may also need other tools such as a soldering torch, flux, and solder for copper pipe installations, or a crimping tool for PEX pipe installations. By having the right tools on hand, you can ensure a smooth and efficient pipe installation.
Measuring and Cutting Pipes: The Right Way
Accurate measurements and precise cuts are essential for a successful pipe installation. To measure a pipe, start by measuring the length of the pipe needed using a tape measure. It is important to measure from the end of the fitting to the end of the fitting, taking into account any additional length needed for the pipe to fit properly.
Once you have measured the pipe, mark the measurement on the pipe using a marker or a pencil. Double-check the measurement to ensure accuracy before cutting the pipe. To cut the pipe, use a pipe cutter that is designed for the specific type of pipe you are working with. Place the pipe cutter around the pipe at the marked measurement and tighten the cutter until it is secure. Rotate the cutter around the pipe several times, tightening it after each rotation, until the pipe is cut through.
After cutting the pipe, use a deburring tool to remove any burrs or rough edges from the cut end of the pipe. This will ensure a smooth and secure connection when joining the pipe to a fitting. Additionally, for copper pipe installations, use a reamer to remove any internal burrs or rough edges from the inside of the pipe. This will ensure a clean and unrestricted flow of water through the pipe.
Tips for Properly Joining Pipes
Properly joining pipes is essential for a strong and leak-free plumbing system. There are several types of pipe joints commonly used in plumbing systems, including soldered joints, threaded joints, compression joints, and push-fit joints. The type of joint you use will depend on the type of pipe and fitting you are working with.
For copper pipe installations, soldered joints are commonly used. To create a soldered joint, start by cleaning the outside of the pipe and the inside of the fitting using a wire brush or sandpaper. Apply flux to the cleaned surfaces to prevent oxidation and ensure a strong bond. Insert the pipe into the fitting and heat the joint using a soldering torch. Once the joint is heated, apply solder to the joint, allowing it to flow into the joint and create a strong bond. Allow the joint to cool and inspect it for any leaks.
For threaded joints, start by wrapping Teflon tape or applying pipe dope to the male threads of the pipe and the female threads of the fitting. This will create a watertight seal when the two pieces are screwed together. Use a pipe wrench to tighten the joint, being careful not to overtighten and damage the threads.
Compression joints are commonly used for connecting pipes to fixtures such as faucets and toilets. To create a compression joint, start by sliding a compression nut and a compression ring onto the pipe. Insert the pipe into the fitting and tighten the compression nut onto the fitting, compressing the ring and creating a watertight seal.
Push-fit joints are a quick and easy way to join pipes without the need for special tools or adhesives. To create a push-fit joint, simply insert the pipe into the fitting until it clicks into place. The fitting is designed with internal O-rings that create a watertight seal when the pipe is inserted.
Regardless of the type of joint you are using, it is important to follow the manufacturer’s instructions and ensure a secure and leak-free connection. Inspect the joint for any signs of leaks and make any necessary adjustments or repairs.
Dealing with Common Pipe Installation Challenges
Pipe installation can sometimes present challenges that require troubleshooting and problem-solving. Some common challenges that you may encounter during pipe installation include leaks, clogs, and misaligned pipes.
If you encounter a leak, it is important to identify the source of the leak and take appropriate action. Start by inspecting the joint for any signs of leaks, such as water dripping or pooling around the joint. If the leak is coming from a soldered joint, you may need to reheat the joint and apply additional solder to create a stronger bond. If the leak is coming from a threaded joint, you may need to tighten the joint or apply additional Teflon tape or pipe dope to create a watertight seal. If the leak is coming from a compression joint, you may need to tighten the compression nut or replace the compression ring. If the leak persists, you may need to disassemble the joint and inspect it for any damage or defects.
If you encounter a clog, it is important to identify the location of the clog and take appropriate action. Start by inspecting the affected pipe for any signs of blockage, such as slow drainage or gurgling sounds. If the clog is located near a fixture, such as a sink or toilet, you may be able to clear the clog using a plunger or a plumbing snake. If the clog is located further down the pipe, you may need to remove the affected section of pipe and clear the clog manually. If the clog persists, you may need to call a professional plumber for assistance.
If you encounter misaligned pipes, it is important to identify the cause of the misalignment and take appropriate action. Start by inspecting the pipes for any signs of misalignment, such as gaps or uneven connections. If the misalignment is due to incorrect measurements or cuts, you may need to remove the affected section of pipe and make the necessary adjustments. If the misalignment is due to a faulty fitting or a damaged pipe, you may need to replace the fitting or the pipe. If the misalignment persists, you may need to call a professional plumber for assistance.
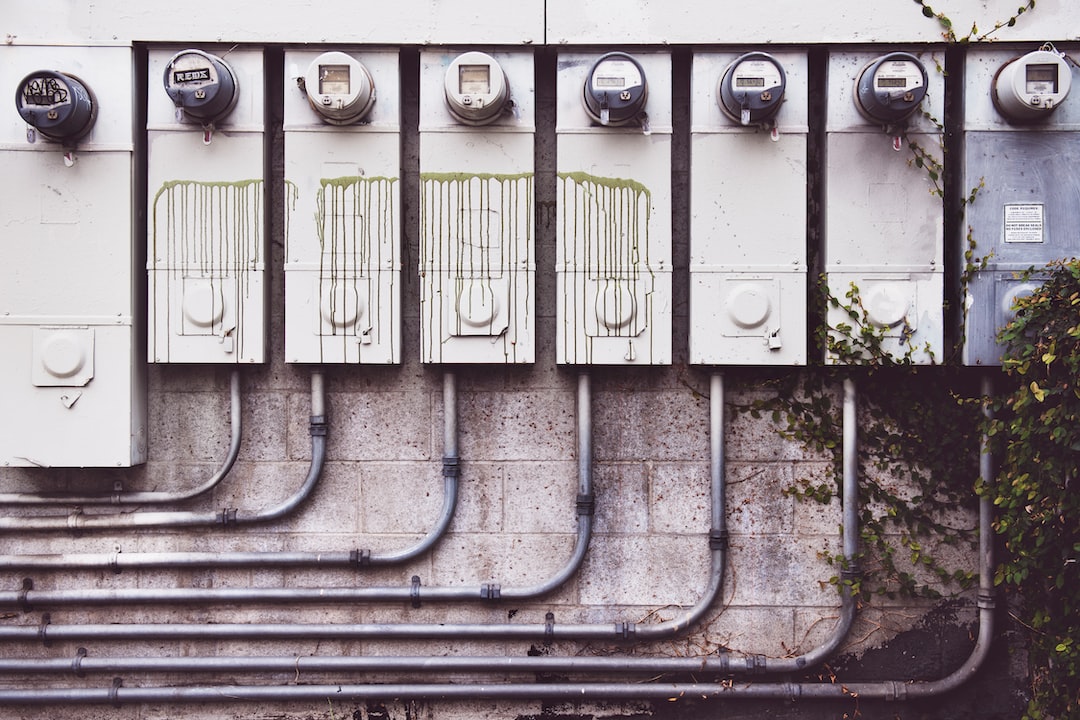
How to Secure Pipes to Prevent Leaks
Securing pipes properly is essential for preventing leaks and ensuring a secure and stable plumbing system. There are several methods for securing pipes, including pipe hangers, pipe clamps, and pipe straps.
Pipe hangers are used to support and secure pipes to walls, ceilings, or other structural elements. They are typically made of metal and come in various sizes and styles to accommodate different types and sizes of pipes. To install a pipe hanger, start by determining the appropriate location for the hanger. Use a level to ensure that the hanger is installed straight and level. Mark the location of the hanger on the wall or ceiling and use a drill to create pilot holes. Insert screws or anchors into the pilot holes and secure the hanger to the wall or ceiling. Place the pipe into the hanger and secure it using the appropriate fasteners.
Pipe clamps are used to secure pipes to other pipes or fittings. They are typically made of metal and come in various sizes and styles to accommodate different types and sizes of pipes. To install a pipe clamp, start by determining the appropriate location for the clamp. Use a level to ensure that the clamp is installed straight and level. Mark the location of the clamp on the pipe and use a drill to create pilot holes. Insert screws or bolts into the pilot holes and tighten them to secure the clamp to the pipe.
Pipe straps are used to secure pipes to walls, ceilings, or other structural elements. They are typically made of metal or plastic and come in various sizes and styles to accommodate different types and sizes of pipes. To install a pipe strap, start by determining the appropriate location for the strap. Use a level to ensure that the strap is installed straight and level. Mark the location of the strap on the wall or ceiling and use a drill to create pilot holes. Insert screws or anchors into the pilot holes and secure the strap to the wall or ceiling. Place the pipe into the strap and secure it using the appropriate fasteners.
When securing pipes, it is important to ensure that they are properly supported and that there is no excessive strain or stress on the pipes or fittings. This will help prevent leaks and ensure a secure and stable plumbing system.
Insulating Pipes for Maximum Efficiency
Insulating pipes is an important step in the pipe installation process, as it helps to prevent heat loss, reduce energy consumption, and protect pipes from freezing. There are several types of insulation commonly used for pipes, including foam insulation, fiberglass insulation, and pipe sleeves.
Foam insulation is a popular choice for insulating pipes, as it is easy to install and provides excellent thermal insulation. Foam insulation comes in the form of pre-cut tubes or sheets that can be easily slipped over the pipe. To install foam insulation, start by measuring the length of the pipe and cutting the foam insulation to the appropriate size. Slip the foam insulation over the pipe, ensuring a snug fit. Use adhesive or tape to secure the insulation in place.
Fiberglass insulation is another common choice for insulating pipes, as it provides excellent thermal insulation and is resistant to moisture and mold. Fiberglass insulation comes in the form of rolls or batts that can be wrapped around the pipe. To install fiberglass insulation, start by measuring the length of the pipe and cutting the insulation to the appropriate size. Wrap the insulation around the pipe, ensuring a snug fit. Use adhesive or tape to secure the insulation in place.
Pipe sleeves are a convenient option for insulating pipes, as they come pre-cut and ready to install. Pipe sleeves are typically made of foam or rubber and provide excellent thermal insulation. To install pipe sleeves, simply slip the sleeve over the pipe, ensuring a snug fit. Use adhesive or tape to secure the sleeve in place.
When insulating pipes, it is important to ensure that the insulation is properly installed and that there are no gaps or openings that could allow heat to escape or cold air to enter. This will help maximize the efficiency of your plumbing system and reduce energy consumption.
Testing Your Pipes: Ensuring Quality Installation
Testing your pipes is an important step in the pipe installation process, as it helps to ensure that the system is functioning properly and that there are no leaks or other issues. There are several types of tests that can be performed on pipes, including pressure tests, water tests, and smoke tests.
Pressure tests are commonly used to test the integrity of a plumbing system and ensure that there are no leaks. To perform a pressure test, start by closing all valves and faucets in the system. Connect a pressure gauge to a test fitting or a hose bib and pressurize the system to the desired pressure. Monitor the pressure gauge for any signs of pressure loss, which could indicate a leak. If the pressure remains steady, the system is considered to be leak-free.
Water tests are commonly used to test the flow and drainage of a plumbing system and ensure that there are no leaks or blockages. These tests involve filling the plumbing system with water and observing its movement and behavior. By doing so, plumbers can identify any potential issues such as leaks, clogs, or inadequate drainage. Water tests are particularly important during the installation or repair of plumbing systems to ensure that everything is functioning properly. Additionally, these tests can also be used to check the integrity of pipes and connections, as well as to verify that the system meets the required standards and regulations. Overall, water tests play a crucial role in maintaining the efficiency and reliability of plumbing systems.
If you’re in the process of pipe installation, you may also be interested in maximizing your home’s curb appeal. Awning installation can be a great way to enhance the exterior of your home and create a welcoming entrance. Check out this article on how awning installation can help to learn more about the benefits and tips for a successful installation.