
Introduction
A bathroom vanity is an essential component of any bathroom. It not only provides storage space for toiletries and other bathroom essentials but also serves as a focal point in the room. Proper installation and maintenance of a bathroom vanity are crucial to ensure its longevity and functionality. This article will guide you through the process of installing a bathroom vanity, from preparing the space to adding finishing touches.
Preparing Your Bathroom Space for a Vanity Installation
Before installing a bathroom vanity, it is important to prepare the space properly. Start by clearing out the area where the vanity will be installed. Remove any existing fixtures, such as the old vanity, sink, and countertop. This will give you a clean slate to work with.
Next, check for any necessary repairs or updates. Inspect the walls and flooring for any damage or signs of wear and tear. Repair or replace any damaged areas before proceeding with the installation. This will ensure that your new vanity is installed on a solid and stable surface.
Proper ventilation is also important in a bathroom. Make sure that the area where the vanity will be installed has adequate ventilation. This will help prevent moisture buildup and potential damage to the vanity and surrounding areas.
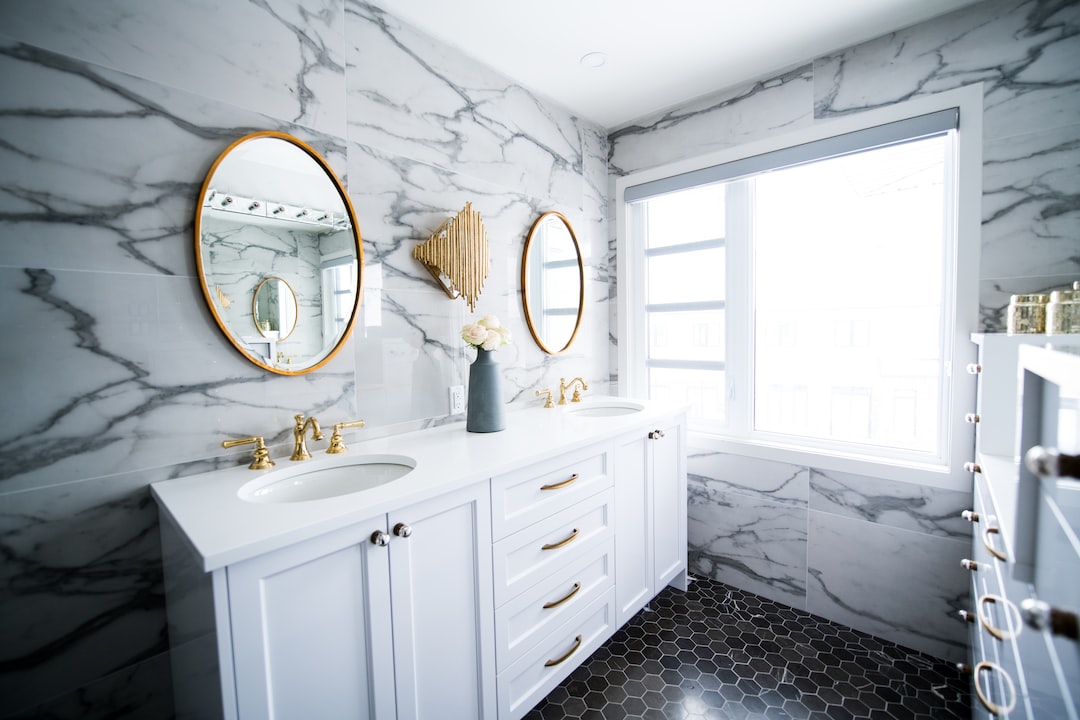
Choosing the Right Vanity for Your Bathroom
When choosing a vanity for your bathroom, there are several factors to consider. First, consider the size of your bathroom and the available space for the vanity. Measure the area where the vanity will be installed to ensure that you choose a vanity that fits properly.
Next, consider the style and material of the vanity. There are various styles and materials to choose from, including traditional, modern, and rustic. Choose a style that complements the overall decor of your bathroom. Additionally, consider the material of the vanity. Common materials include wood, laminate, and glass. Choose a material that is durable and easy to maintain.
Budget considerations are also important when choosing a vanity. Set a budget for your vanity installation project and stick to it. There are options available at various price points, so you can find a vanity that fits your budget without compromising on quality.
Measuring and Marking Your Vanity Placement
Accurate measurements are crucial when installing a bathroom vanity. Start by measuring the space where the vanity will be installed. Measure the width, height, and depth of the area. Take into account any obstructions, such as doors and windows, and ensure that there is enough clearance for them to open and close properly.
Once you have measured the space, mark the placement of the vanity on the wall. Use a pencil to mark the top and bottom edges of the vanity, as well as the location of any plumbing fixtures. This will serve as a guide during the installation process.
Ensure proper clearance for doors and drawers. Measure the distance between the vanity and any adjacent fixtures, such as toilets or bathtubs. Make sure there is enough space for doors and drawers to open and close without obstruction.
Preparing Your Plumbing for Vanity Installation
Before installing a new vanity, it is important to shut off the water supply to the bathroom. Locate the shut-off valve for the bathroom and turn it off. This will prevent any water from flowing while you work on the plumbing.
Next, remove any old plumbing fixtures, such as the sink and faucet. Disconnect the water supply lines and drain lines from the fixtures. Use a wrench to loosen and remove any nuts or bolts holding the fixtures in place. Be careful not to damage any pipes or fittings during this process.
If necessary, update the plumbing as part of the vanity installation. This may involve replacing old pipes or fittings with new ones. Consult a professional plumber if you are unsure about how to proceed with the plumbing updates.
Assembling Your Vanity
Once you have prepared the space and plumbing, it is time to assemble your vanity. Start by carefully unpacking all the pieces and checking that all the necessary components are included. Read the manufacturer’s instructions carefully and follow them step by step.
Assemble the vanity according to the instructions, making sure to properly align and secure all the pieces. Use the provided hardware, such as screws and brackets, to secure the vanity together. Pay attention to any specific instructions regarding the assembly process, such as the order in which the pieces should be assembled.
Ensure that the vanity is level and stable before proceeding with the installation. Use a level to check that the vanity is straight and adjust as necessary. This will ensure that the vanity functions properly and does not wobble or tip over.
Securing Your Vanity to the Wall
Properly anchoring the vanity to the wall is essential for stability and safety. Use a stud finder to locate the wall studs behind the vanity. Mark the location of the studs on the wall.
Next, use screws or brackets to secure the vanity to the wall studs. Make sure to use the appropriate size and type of screws or brackets for your specific vanity. Follow the manufacturer’s instructions for securing the vanity to the wall.
Check that the vanity is securely attached to the wall and does not wobble or move. This will ensure that the vanity remains stable and does not pose a safety hazard.
Connecting Your Vanity to Your Plumbing
After securing the vanity to the wall, it is time to connect it to the plumbing. Start by installing new plumbing fixtures, such as the sink and faucet. Follow the manufacturer’s instructions for installing the fixtures, making sure to properly align and secure them.
Next, connect the water supply lines and drain lines to the plumbing fixtures. Use the appropriate fittings and connectors for your specific plumbing setup. Tighten the fittings securely, but be careful not to overtighten and damage the pipes or fittings.
Once the plumbing fixtures are connected, turn on the water supply to the bathroom. Check for any leaks or drips and make any necessary adjustments or repairs. It is important to ensure that the plumbing is functioning properly before proceeding with the installation.
Installing Your Vanity Top and Sink
After connecting the plumbing, it is time to install the vanity top and sink. Start by carefully placing the sink onto the vanity top. Make sure that the sink is properly aligned and centered on the vanity top.
Next, secure the sink to the vanity top using the provided hardware. Follow the manufacturer’s instructions for securing the sink, making sure to use the appropriate screws or brackets.
Once the sink is securely attached, seal the sink to the vanity top using silicone caulk. Apply a thin bead of caulk around the edges of the sink, smoothing it out with a caulk tool or your finger. This will create a watertight seal and prevent any water from seeping between the sink and vanity top.
Adding Finishing Touches to Your Vanity Installation
With the vanity and sink installed, it is time to add the finishing touches. Start by installing any hardware, such as drawer pulls and cabinet knobs. Choose hardware that complements the style of your vanity and bathroom decor.
Next, consider adding lighting and decor to enhance the overall look of your vanity. Install vanity lights above the mirror or on either side of it. Choose lighting fixtures that provide adequate illumination for the space.
Finally, clean up the space and remove any debris or dust from the installation process. Wipe down the vanity, sink, and countertop with a mild cleaner to remove any fingerprints or smudges. This will give your vanity a polished and finished look.
Maintaining Your Bathroom Vanity for Longevity
Proper maintenance is essential to ensure the longevity and functionality of your bathroom vanity. Regular cleaning is important to prevent the buildup of dirt, grime, and moisture. Use a mild cleaner and a soft cloth to clean the vanity, sink, and countertop. Avoid using harsh chemicals or abrasive materials, as they can damage the finish of the vanity.
Check for any leaks or repairs as necessary. Inspect the plumbing fixtures and connections regularly to ensure that there are no leaks or drips. If you notice any issues, such as a leaky faucet or a loose connection, make the necessary repairs or contact a professional plumber for assistance.
Additionally, avoid placing heavy or sharp objects on the vanity, as they can cause damage. Use coasters or trays to protect the vanity surface from spills or scratches. This will help maintain the appearance and functionality of your vanity over time.
Conclusion
Installing a bathroom vanity is a rewarding project that can enhance the functionality and aesthetics of your bathroom. By following the steps outlined in this article, you can ensure a successful installation and enjoy your new vanity for years to come. Remember to properly prepare the space, choose the right vanity, measure and mark the placement, prepare the plumbing, assemble and secure the vanity, connect the plumbing, install the vanity top and sink, add finishing touches, and maintain the vanity for longevity. With proper installation and maintenance, your bathroom vanity will be a beautiful and functional addition to your bathroom.
If you’re in the process of Bathroom Vanity Installation, you may also be interested in reading about the benefits of Attic Fan Installation. Attic fans can help improve ventilation and airflow in your home, reducing energy costs and preventing moisture buildup. To learn more about the advantages of attic fan installation and why you need one in your home, check out this informative article: The Benefits of Attic Fan Installation: Why You Need One in Your Home.