
Introduction
Maintaining the exterior of your home is just as important as taking care of the interior. The exterior is the first thing people see when they approach your home, and it plays a crucial role in protecting your property from the elements. Regular maintenance not only enhances the curb appeal of your home but also helps prevent costly repairs down the line. In this article, we will explore the most common types of exterior damage, provide a step-by-step guide to DIY repairs, and discuss when it’s best to call in a professional.
The Most Common Types of Exterior Damage and How to Spot Them
Weather-related damage is one of the most common issues homeowners face. Harsh weather conditions such as heavy rain, strong winds, and extreme temperatures can cause significant damage to the exterior of your home. Look for signs of water stains, rotting wood, or peeling paint, as these are indicators of weather-related damage. Additionally, inspect your roof for missing or damaged shingles, as well as your gutters for clogs or leaks.
Water damage can wreak havoc on your home if left untreated. Look for signs of water stains, mold, or mildew on your walls, ceilings, or floors. Pay close attention to areas around windows and doors, as well as the foundation of your home. If you notice any signs of water damage, it’s important to address the issue promptly to prevent further damage and potential health hazards.
Cracks and holes in your exterior walls can compromise the structural integrity of your home. Inspect your walls for any visible cracks or holes, paying close attention to areas where water may have seeped in. These can be caused by settling, foundation issues, or even pests. It’s important to repair these cracks and holes as soon as possible to prevent further damage and potential pest infestations.
Fading and discoloration are common issues that can make your home look worn and outdated. Exposure to sunlight and harsh weather conditions can cause paint to fade and surfaces to discolor over time. Regularly inspect your home’s exterior for any signs of fading or discoloration, and consider repainting or refinishing surfaces to restore their appearance.
Pest damage is another common issue that homeowners may face. Pests such as termites, carpenter ants, and wood-boring beetles can cause significant damage to the structure of your home. Look for signs of wood damage, such as hollow-sounding wood or small holes, as well as droppings or shed wings. If you suspect a pest infestation, it’s important to address the issue promptly to prevent further damage.
Essential Tools and Materials for DIY Exterior Repairs
Before you begin any DIY exterior repairs, it’s important to have the right tools and materials on hand. Here are some essential items you’ll need:
Safety equipment: Safety should always be a top priority when working on any home improvement project. Make sure you have safety goggles, gloves, a dust mask, and sturdy footwear to protect yourself from potential hazards.
Basic tools: You’ll need a variety of basic tools for exterior repairs, including a hammer, screwdrivers, a utility knife, a pry bar, a putty knife, a trowel, and a caulk gun. These tools will help you remove damaged materials, apply repairs, and smooth surfaces.
Materials for repairs: The specific materials you’ll need will depend on the type of repair you’re doing. For brick repairs, you’ll need mortar mix, a tuckpointing tool, and a brick chisel. For stucco repairs, you’ll need stucco patching compound, a trowel, and a sponge. For siding repairs, you’ll need replacement siding, a circular saw, and a nail gun. Make sure to research the specific materials needed for your repair project before getting started.
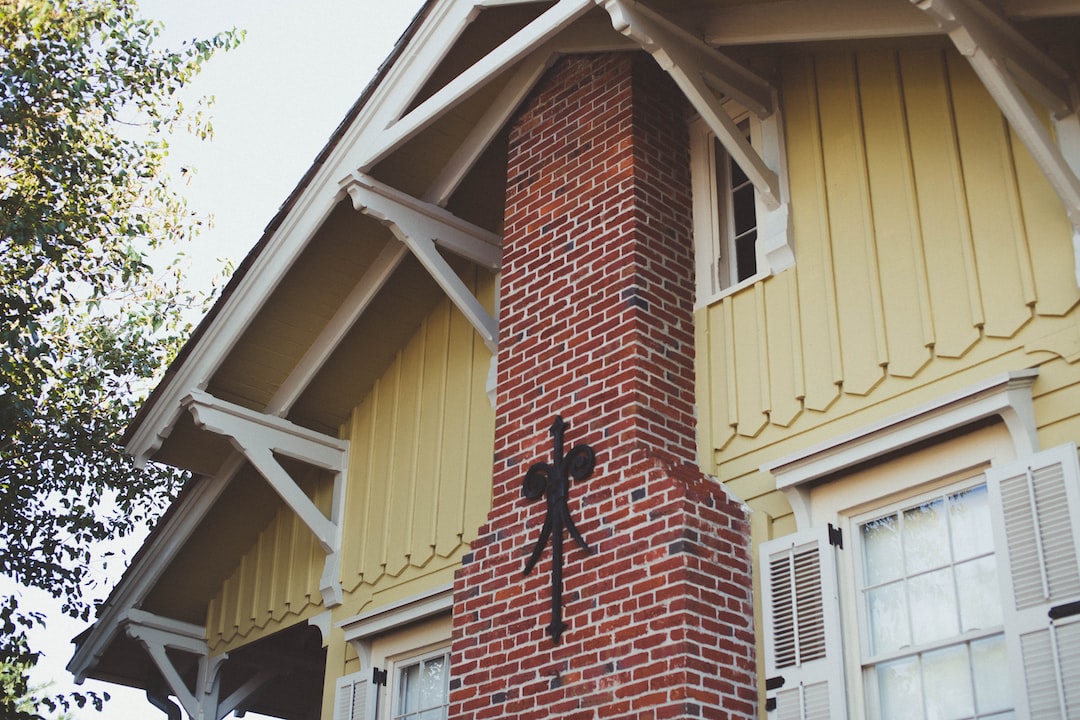
Step-by-Step Guide to Repairing Cracks and Holes in Brick Walls
Brick walls can develop cracks and holes over time, which can compromise their structural integrity and allow water to seep in. Here’s a step-by-step guide to repairing cracks and holes in brick walls:
1. Preparing the surface: Start by cleaning the area around the crack or hole with a wire brush to remove any loose debris or mortar. Use a damp cloth to wipe away any remaining dust or dirt.
2. Filling the crack or hole: Mix mortar according to the manufacturer’s instructions. Using a trowel, apply a layer of mortar to the crack or hole, making sure to fill it completely. Use the trowel to smooth the surface, ensuring it is level with the surrounding brick.
3. Smoothing and finishing the repair: Once the mortar has dried slightly, use a brush or sponge to lightly dampen the surface. This will help the mortar blend in with the surrounding brick. Use a trowel or jointing tool to create a smooth finish, matching the texture of the surrounding brick. Allow the mortar to dry completely before applying any sealant or paint.
How to Replace Damaged Bricks and Mortar Joints
If you have severely damaged bricks or mortar joints, they may need to be replaced. Here’s a step-by-step guide to replacing damaged bricks and mortar joints:
1. Removing damaged bricks: Start by removing any loose or damaged bricks. Use a chisel and hammer to carefully chip away the mortar around the damaged brick. Once the mortar is removed, gently tap the brick with a hammer to loosen it. Carefully remove the brick from the wall.
2. Mixing and applying new mortar: Mix mortar according to the manufacturer’s instructions. Apply a layer of mortar to the back of the replacement brick, making sure to cover the entire surface. Press the brick firmly into place, making sure it is level with the surrounding bricks. Use a trowel to smooth the mortar, ensuring it is flush with the surrounding joints.
3. Installing new bricks: Once the mortar has dried slightly, use a brush or sponge to lightly dampen the surface. This will help the mortar blend in with the surrounding brick. Use a trowel or jointing tool to create a smooth finish, matching the texture of the surrounding brick. Allow the mortar to dry completely before applying any sealant or paint.
Tips for Cleaning and Maintaining Brick and Stone Surfaces
Cleaning and maintaining brick and stone surfaces is essential for preserving their appearance and longevity. Here are some tips for cleaning and maintaining these surfaces:
Cleaning methods: Use a mild detergent and water solution to clean brick and stone surfaces. Avoid using harsh chemicals or abrasive cleaners, as these can damage the surface. Use a soft brush or sponge to scrub the surface gently, and rinse with clean water.
Preventative maintenance: Regularly inspect your brick and stone surfaces for any signs of damage or wear. Address any issues promptly to prevent further damage. Additionally, keep the area around these surfaces clear of debris and vegetation, as this can cause moisture buildup and potential damage.
Sealing and protecting surfaces: Consider applying a sealant to your brick and stone surfaces to protect them from moisture and stains. Consult with a professional to determine the best type of sealant for your specific surface. Apply the sealant according to the manufacturer’s instructions, and reapply as needed.
Repairing and Replacing Damaged Stucco and Siding
Stucco and siding are popular exterior materials that can become damaged over time. Here’s how to repair and replace damaged stucco and siding:
Identifying damage: Inspect your stucco or siding for any signs of cracks, holes, or rotting. Pay close attention to areas where water may have seeped in, such as around windows and doors. If you notice any damage, it’s important to address it promptly to prevent further issues.
Repairing small areas: For small areas of damage, such as cracks or holes, you can use a stucco patching compound or a siding repair kit. Follow the manufacturer’s instructions to apply the patching compound or repair kit, making sure to smooth the surface and blend it with the surrounding area.
Replacing larger sections: If you have larger areas of damage or extensive rotting, it may be necessary to replace the entire section of stucco or siding. Consult with a professional to determine the best course of action for your specific situation. Follow the manufacturer’s instructions for removing the damaged section and installing the replacement material.
Addressing Water Damage and Preventing Future Issues
Water damage can cause significant issues if left untreated. Here’s how to address water damage and prevent future issues:
Identifying sources of water damage: Start by identifying the source of the water damage. Look for signs of leaks, such as water stains, mold, or mildew. Inspect your roof, gutters, windows, and doors for any signs of damage or leaks. Address any issues promptly to prevent further damage.
Repairing damage: Once you’ve identified the source of the water damage, it’s important to repair it promptly. This may involve fixing a leaky roof, replacing damaged gutters, or sealing gaps around windows and doors. Consult with a professional if you’re unsure how to address the issue.
Preventative measures: To prevent future water damage, make sure your home is properly sealed and protected from the elements. Regularly inspect your roof, gutters, and windows for any signs of damage or wear. Keep your gutters clean and free of debris to ensure proper drainage. Consider installing a waterproofing system or applying a water-resistant sealant to vulnerable areas.
Painting and Sealing Your Home’s Exterior for Longevity
Painting and sealing your home’s exterior is an important step in maintaining its appearance and longevity. Here’s how to paint and seal your home’s exterior:
Choosing the right paint and sealant: Select a high-quality paint and sealant that is specifically designed for exterior use. Consider factors such as durability, weather resistance, and color options. Consult with a professional or visit a local home improvement store for guidance on the best products for your specific needs.
Preparing the surface: Before painting or sealing, it’s important to prepare the surface properly. This may involve cleaning the surface, removing any loose or peeling paint, and repairing any damage. Follow the manufacturer’s instructions for surface preparation.
Applying paint and sealant: Once the surface is prepared, apply the paint or sealant according to the manufacturer’s instructions. Use a brush, roller, or sprayer to evenly coat the surface, making sure to cover all areas. Allow the paint or sealant to dry completely before applying additional coats or finishing touches.
When to Call in a Professional: Signs You Need Expert Help with Exterior Repairs
While many exterior repairs can be done as DIY projects, there are certain situations where it’s best to call in a professional. Here are some signs that you may need expert help with exterior repairs:
Structural damage: If you notice any signs of structural damage, such as sagging walls, cracks in the foundation, or shifting of the structure, it’s important to consult with a professional. Structural issues require specialized knowledge and expertise to address properly.
Extensive damage: If the damage to your home’s exterior is extensive or widespread, it may be best to hire a professional. They will have the necessary tools, materials, and experience to handle large-scale repairs efficiently and effectively.
Safety concerns: If the repair project involves working at heights, handling hazardous materials, or dealing with electrical components, it’s important to prioritize safety. Hiring a professional ensures that the work is done safely and in compliance with building codes and regulations.
Lack of experience or knowledge: If you’re unsure how to properly address a specific repair or lack the necessary experience or knowledge, it’s best to leave it to the professionals. Attempting complex repairs without the proper expertise can lead to further damage and costly mistakes.
Conclusion
Regular maintenance of your home’s exterior is essential for preserving its appearance, protecting it from the elements, and preventing costly repairs. By identifying and addressing common types of exterior damage, using the right tools and materials for DIY repairs, and knowing when to call in a professional, you can ensure that your home remains in good condition for years to come. Take the time to inspect your home’s exterior regularly, and address any issues promptly to maintain its curb appeal and value.
If you’re looking to repair the bricks in your home, you may also be interested in learning about the benefits of professional attic insulation installation. This article from InstaTasks explains why attic insulation is worth the investment and how it can improve the energy efficiency of your home. With proper insulation, you can save on heating and cooling costs while creating a more comfortable living environment. Check out the article here to learn more.